Salesforce
Salesforce is the world's leading CRM platform for managing customer relationships, sales, service, and marketing.
Authentication Types
Salesforce supports 1 authentication method:
- OAuth - Create your own Salesforce Connected App. Every user connects with their Salesforce account.
- Pros: Full control, per-user tracking, production-ready
- Cons: Requires Salesforce admin access
General Settings
Before using the connector, you need to configure:
- Salesforce Instance URL - Your Salesforce instance URL (e.g.,
https://yourcompany.salesforce.com)
Setting up OAuth
-
Log in to your Salesforce org as an administrator
-
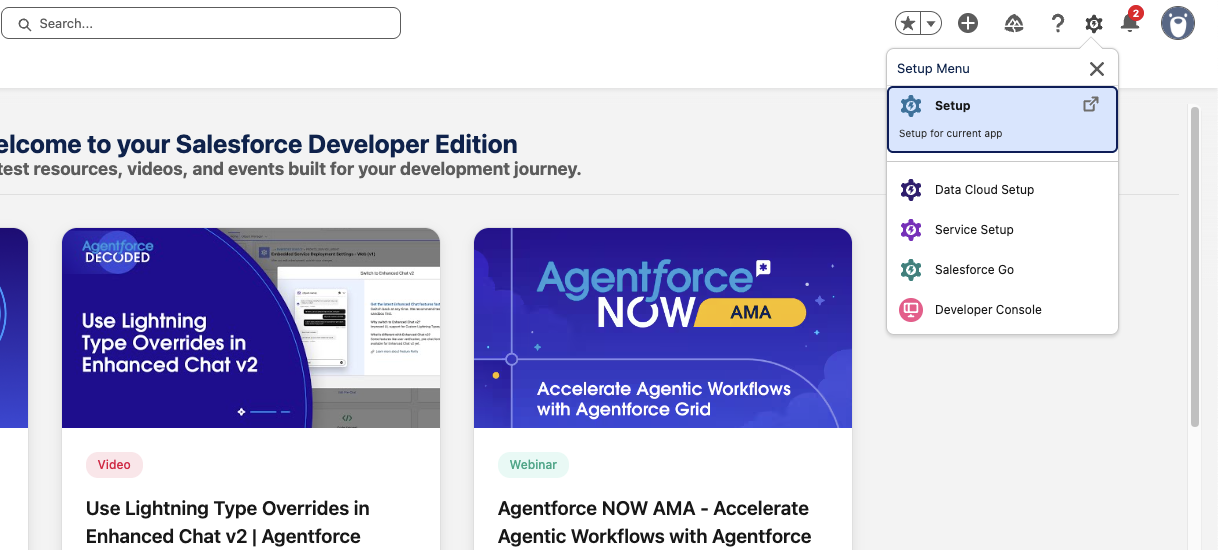
Go to Setup (gear icon in the top right)
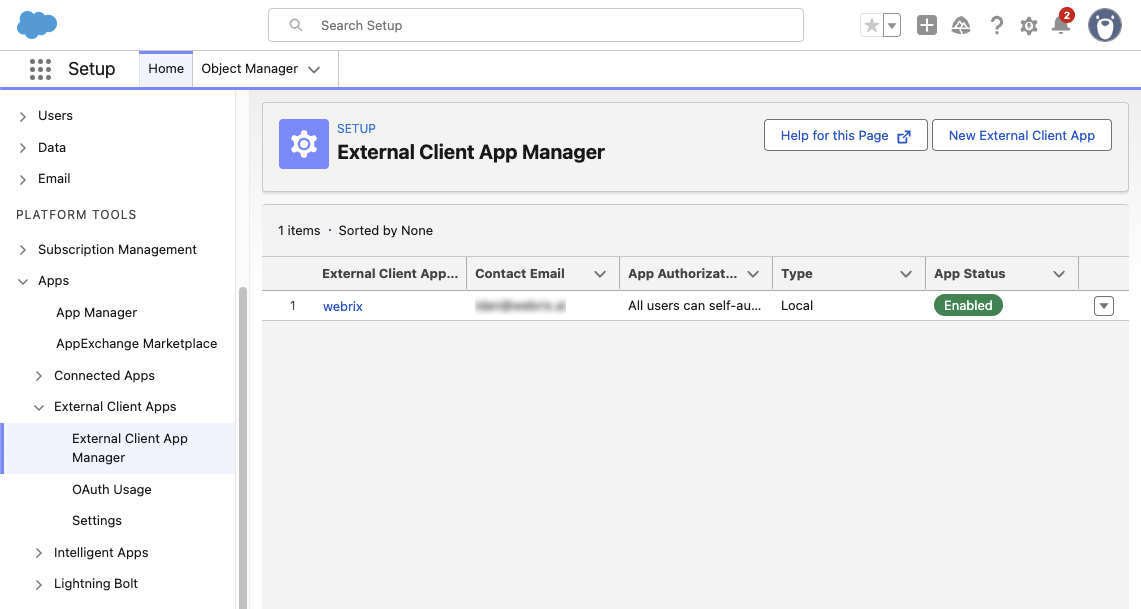
- Under Apps -> External Client Apps -> External Client App Manager -> Click New External CLient App
-
Fill in the Basic Information:
- External Client App Namee: Give it a descriptive name (e.g., "Webrix")
- API Name: Auto-generated from the name
- Contact Email: Your email address
- Distribution State: Local
-
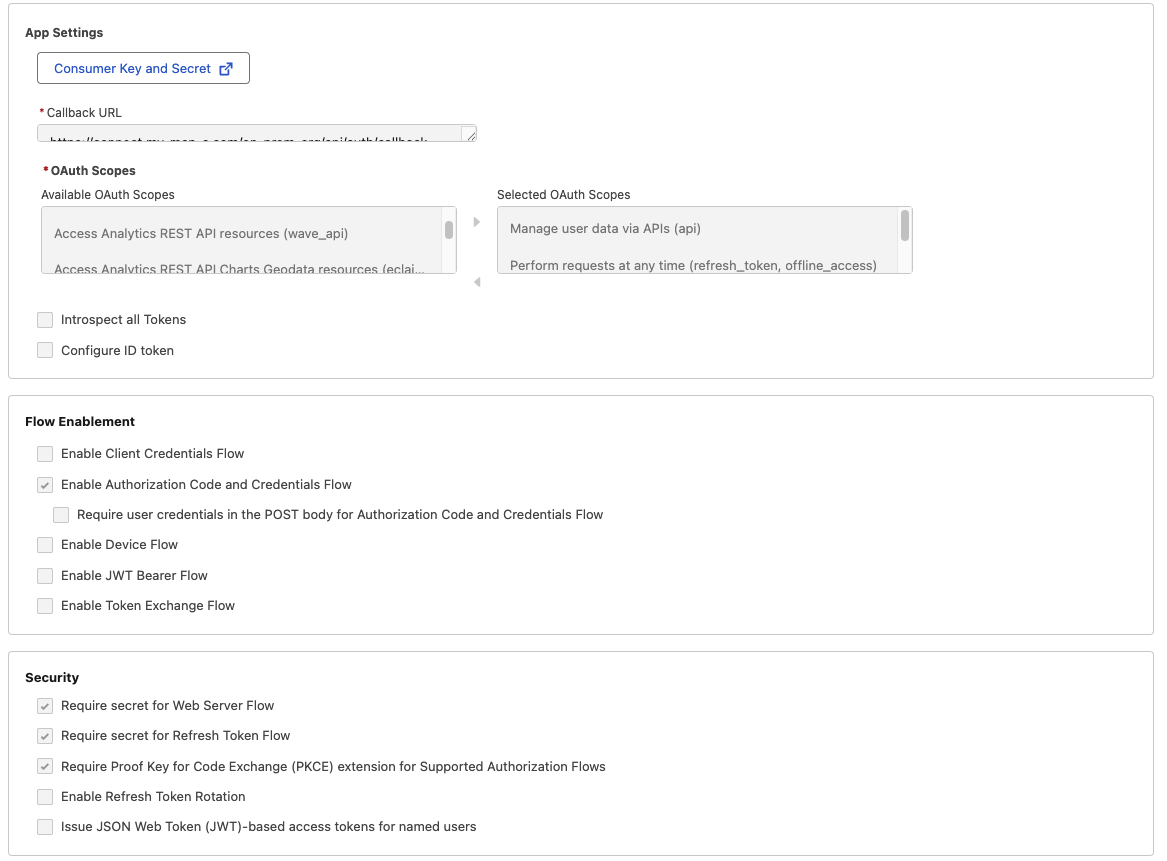
Under API (Enable OAuth Settings):
- Check Enable OAuth Settings
- App Settings
- Callback URL: Copy the Redirect URL from Webrix and paste it here
- OAuth Scopes: Add the scopes you need (e.g.,
Full access (full),Perform requests at any time (refresh_token, offline_access))infoRemeber the scopes - you would need to add the exact scopes in the Webrix Platform
- Flow Enablement
- Check the Enable Authorization Code and Credentials Flow
- Security
- Require Web Server Flow, Refresh Token Flow and PKCE
-
Click Create
-
Click Settings -> OAuth Settings -> Consumer Key and Secret
-
Copy the Consumer Key (Client ID) and Consumer Secret (Client Secret)
-
In Webrix, paste the Consumer Key and Consumer Secret
-
Enter your Salesforce Instance URL in General Settings
-
Select the same scopes you configured in Salesforce
-
Click Save Changes
Troubleshooting
Empty Credentials Error
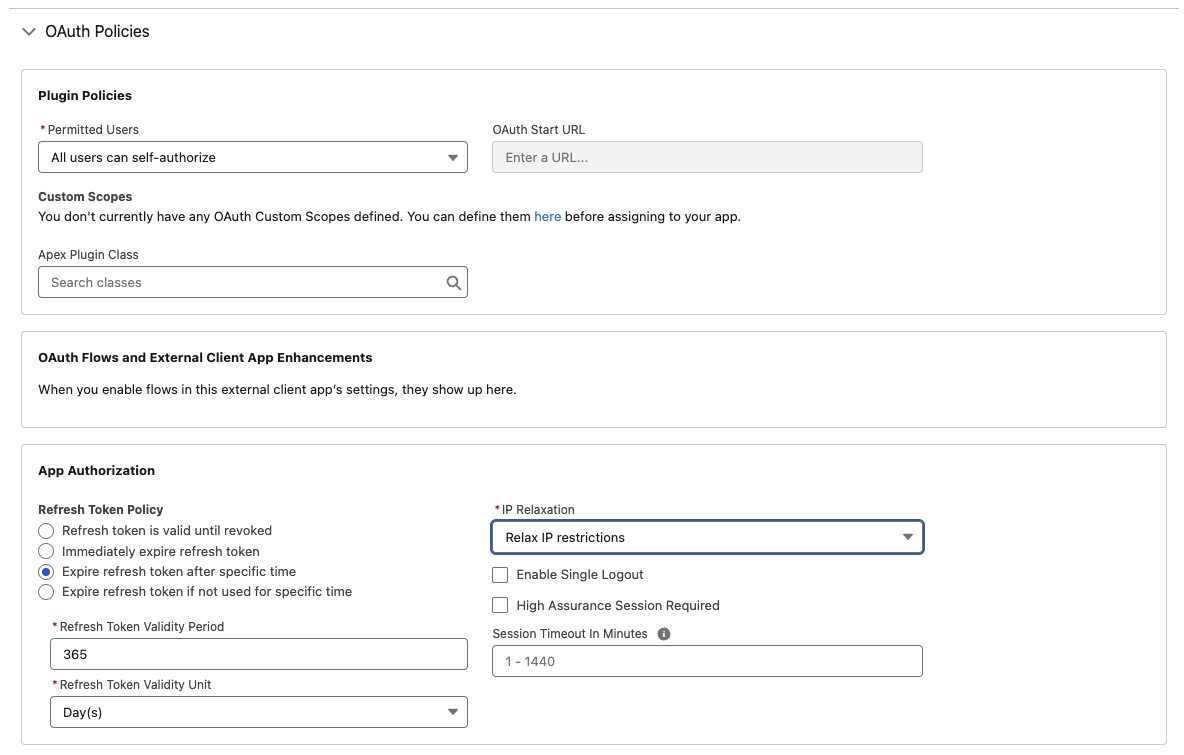
If your users are prompted with the consent screen but after authorizing get an "Empty Credentials" error, this is likely due to IP restrictions in your Salesforce organization.
Solution:
- Check your IP restrictions internally in your Salesforce organization
- Go to your External Client App in Salesforce
- Navigate to Policies tab
- Click Edit
- Under OAuth Policies -> IP Relaxation -> Select Relax IP restrictions
- Save your changes