Okta SSO
Set up Okta as your identity provider for Webrix.
Prerequisites
- An active Okta account with administrative privileges
- A Webrix account with administrative access
Supported features
SSO Features
- SP-initiated SSO
SCIM Features
- Import Users
- Create Users
- Update User Attributes
- Deactivate Users
- Group Push
Configuration steps
Add Webrix integration
- Sign in to your Okta Admin Console at
https://{your-org}-admin.okta.com/admin/apps/add-app - Navigate to Applications → Browse App Catalog
- Search for Webrix in the search bar
- Click + Add Integration
- Fill in the application details:
- Application label: Enter a name for your app (recommended: "Webrix")
- Webrix Admin URL:
- For SaaS deployments:
app.webrix.ai - For On-Premise deployments: Your
APP_URL(for example,webrix-admin.your-domain.com)
- For SaaS deployments:
- Webrix Dashboard URL:
- For SaaS deployments:
{your-webrix-org}.mcp-s.com - For On-Premise deployments: Your
CONNECT_URL(for example,webrix-dashboard.your-domain.com)
- For SaaS deployments:
- Click Done
Configure SSO
- In the Webrix app on Okta, navigate to the Sign On tab
- Click Edit in the OpenID Connect ID Token section
- Under Credentials Details, set Application username format to Email
- Click Save
- Copy the Client ID and Client secret values
- Open a new browser tab and go to your Webrix Admin Console at
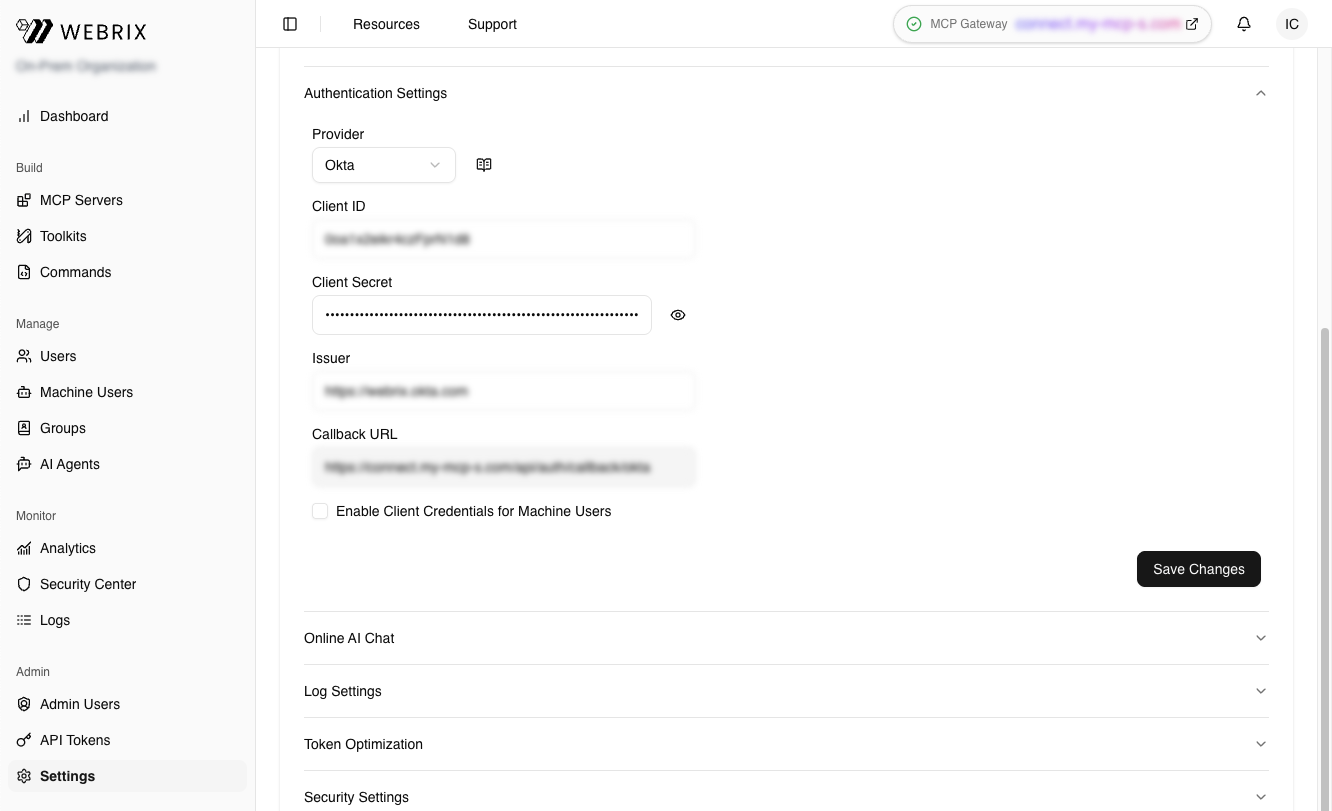
https://app.webrix.ai/admin/settings - Navigate to Settings → Authentication
- Select Provider: Okta from the dropdown
- Enter the following values:
- Client ID: Paste the Client ID from step 5
- Client Secret: Paste the Client secret from step 5
- Issuer: Your Okta domain URL (for example,
https://acme-corp.okta.com)
- Click Save Changes
Your SSO configuration is now complete.
Assign users or groups
- Return to the Okta Admin Console
- In the Webrix app, navigate to the Assignments tab
- Click Assign and select Assign to People or Assign to Groups
- Select the users or groups who should have access to Webrix
- Click Assign and then Done
Add users to Webrix
- Go to
https://app.webrix.ai/manage/users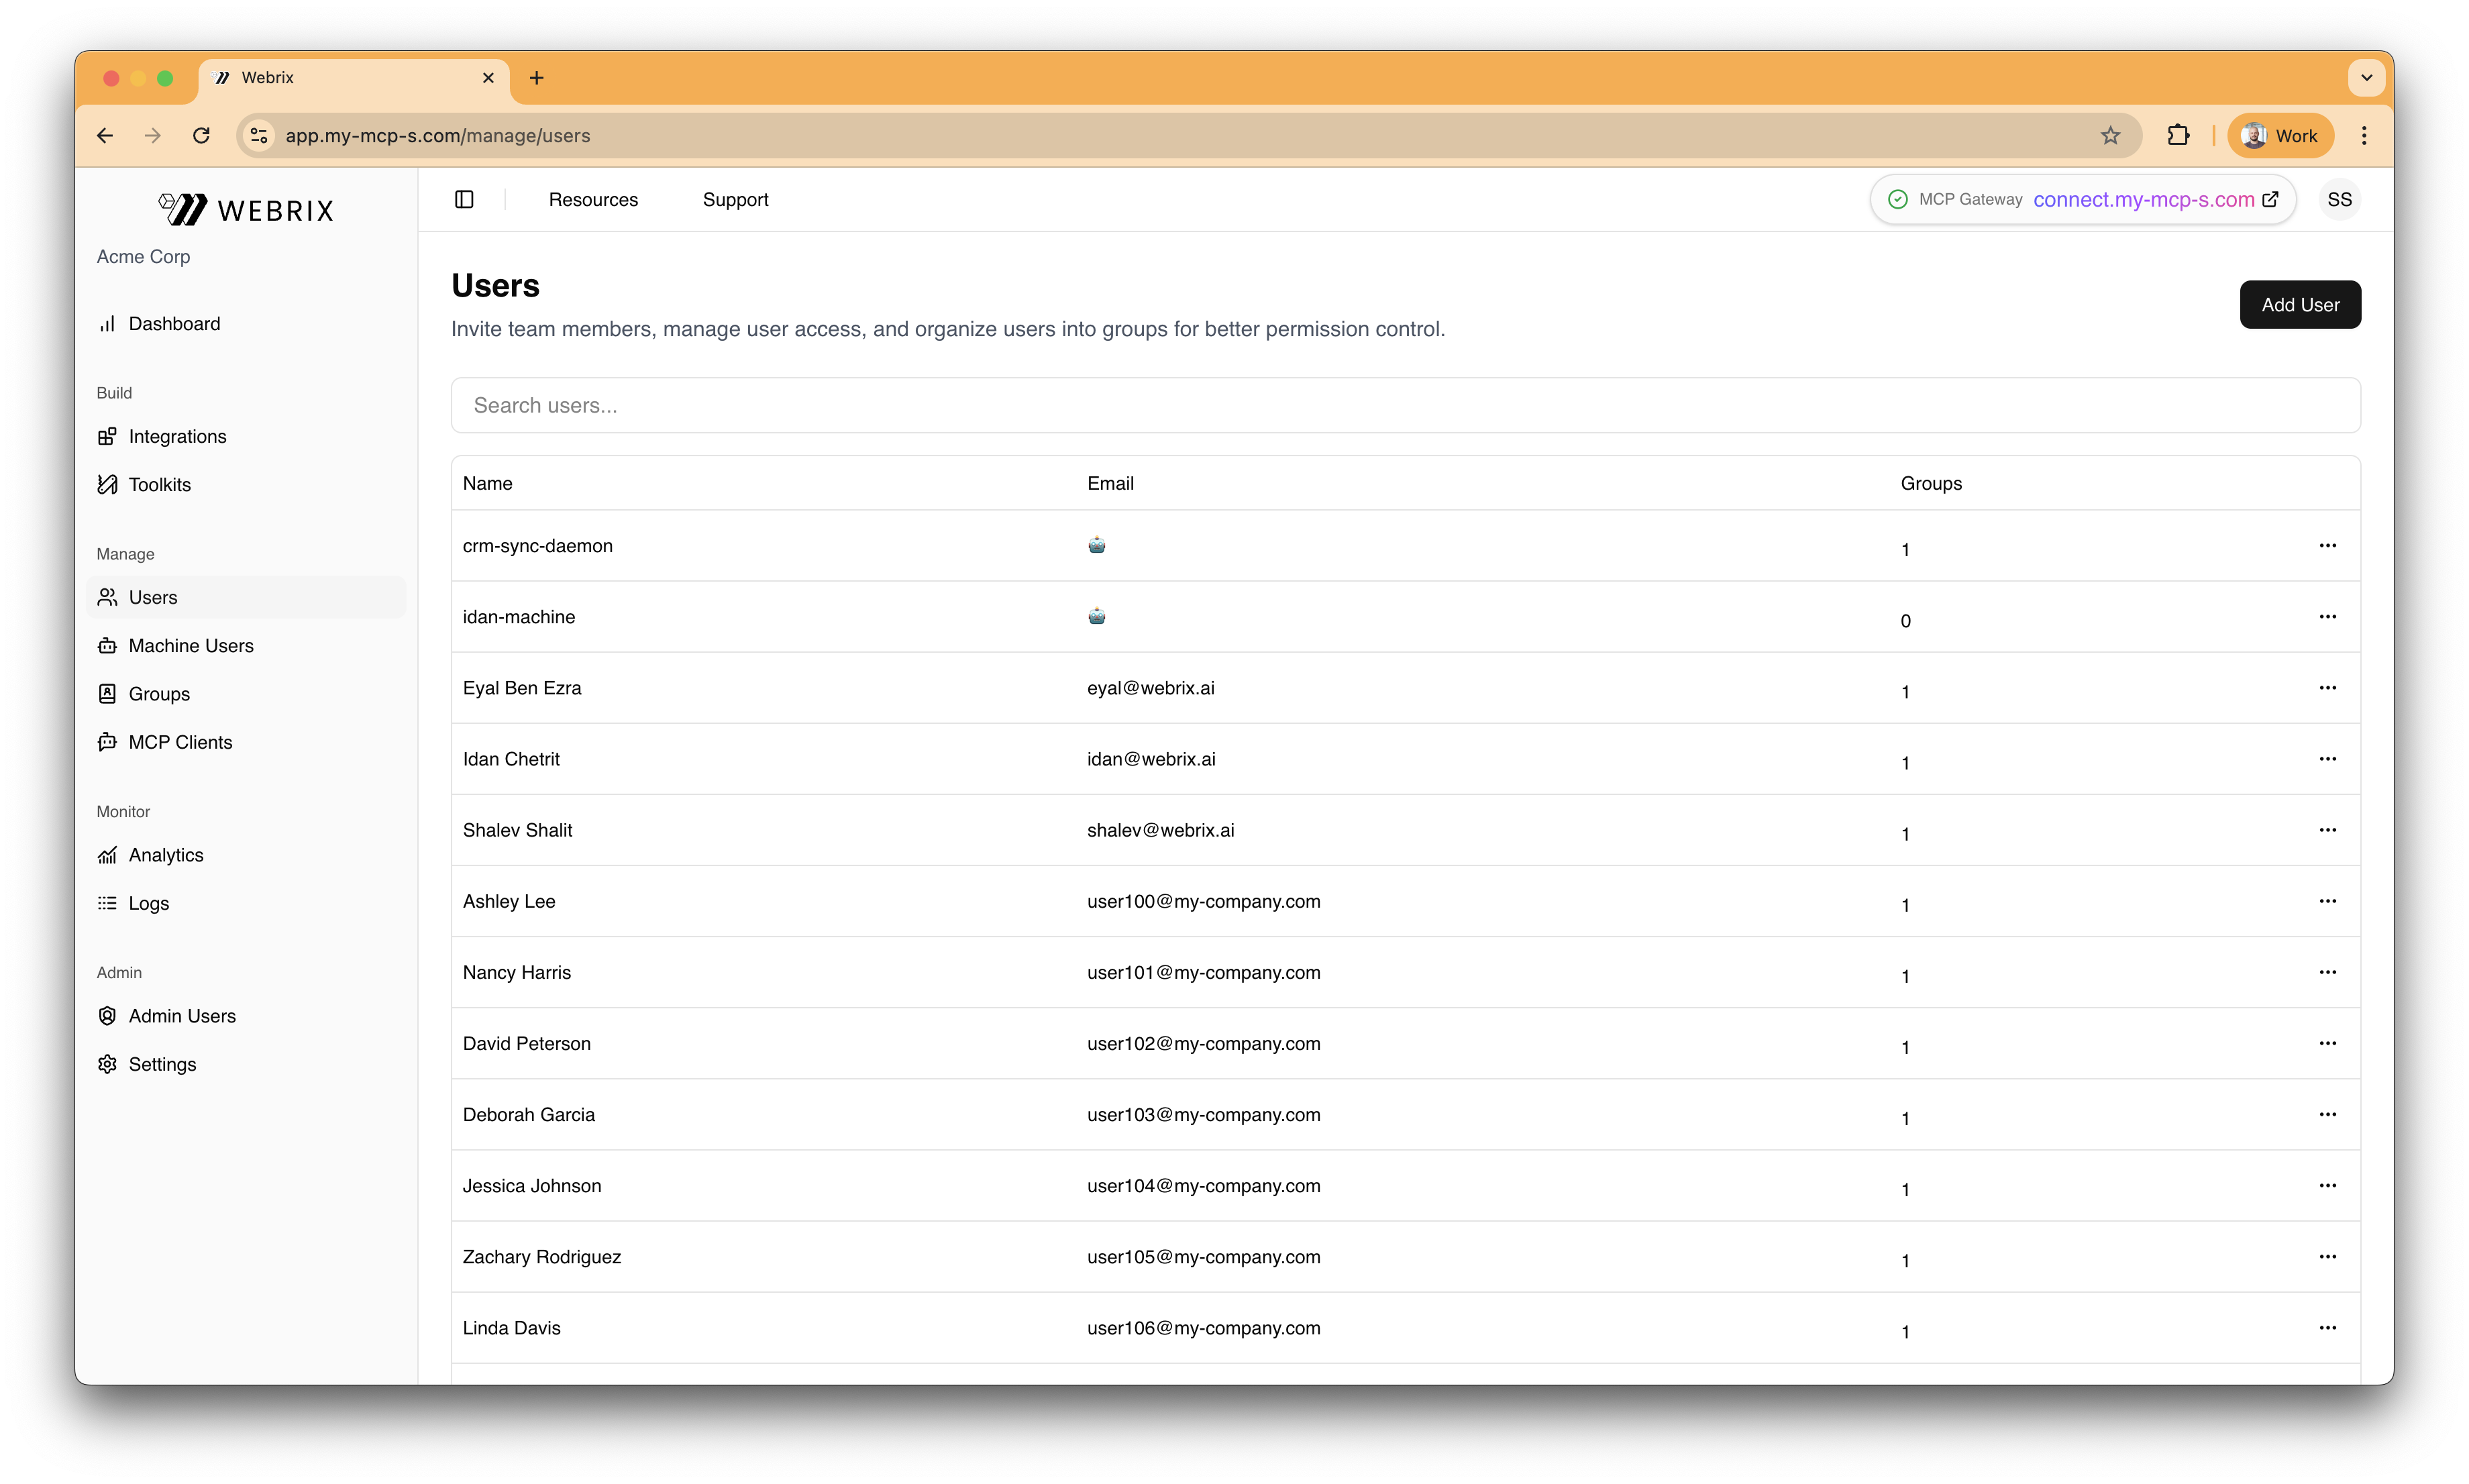
- Click Add User
- Enter the user's name and email
- Click Create
SP-initiated SSO
Users can sign in to Webrix by starting from the Webrix dashboard:
- Navigate to your Webrix dashboard at
https://{your-webrix-org}.mcp-s.com - You'll be automatically redirected to Okta to authenticate
- Enter your Okta credentials (if not already signed in to Okta)
- After successful authentication, you'll be redirected back to the Webrix dashboard
Configure SCIM provisioning
If you want to automatically provision and manage users from Okta to Webrix, follow these steps:
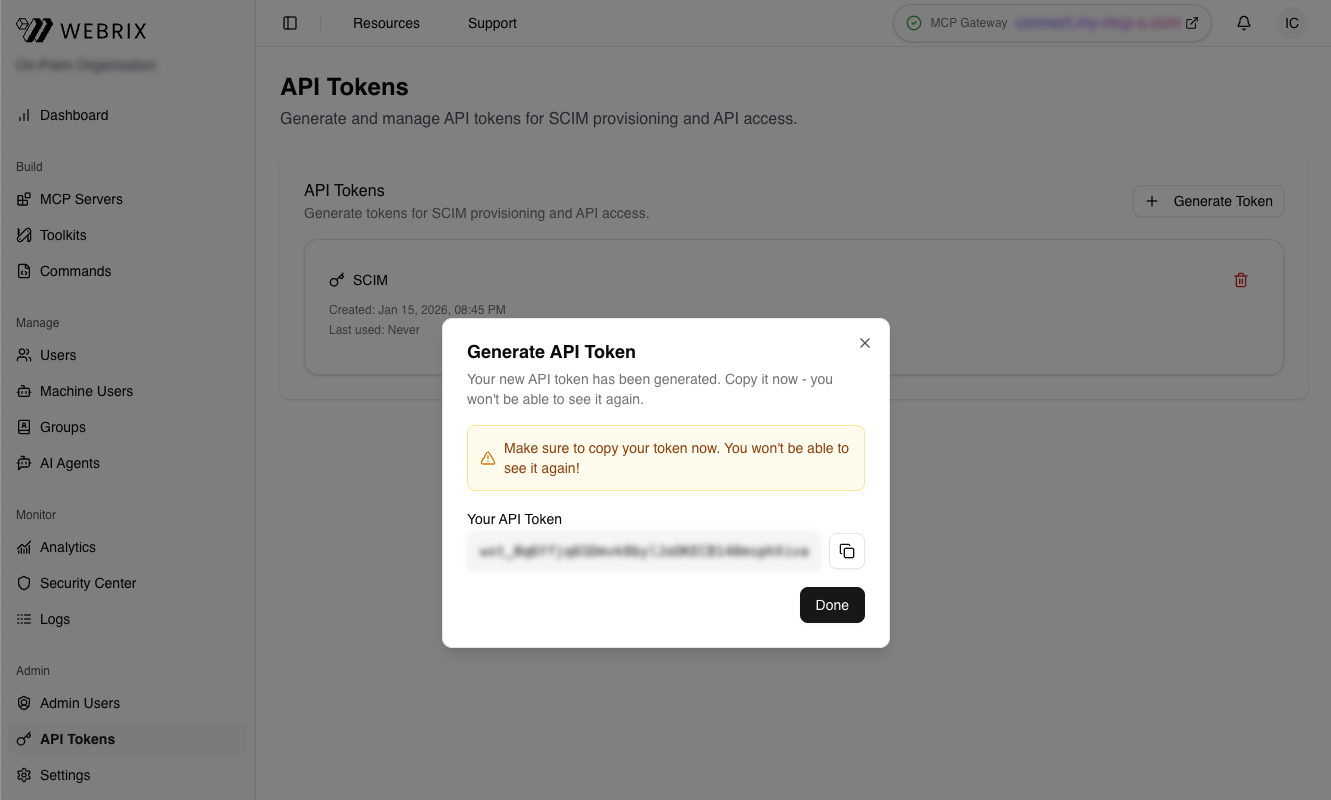
- In your Webrix Admin Console, navigate to
https://app.webrix.ai/admin/api-tokens - Click Generate Token
-
Enter a descriptive name for the token (for example, "Okta SCIM")
-
Click Generate
-
Copy the API Token (it starts with
wxt_...)Important: Save this token securely. You won't be able to see it again.
-
Return to the Okta Admin Console
-
In the Webrix app, navigate to the Provisioning tab
-
Click Configure API Integration
-
Check the Enable API integration checkbox
-
Paste the API token from step 5 into the API Token field
-
Click Test API Credentials to verify the connection
-
Click Save
-
Navigate to Provisioning → To App → Edit
-
Enable the following features:
- Create Users: Automatically create new users in Webrix when assigned in Okta
- Update User Attributes: Sync user attribute changes from Okta to Webrix
- Deactivate Users: Automatically deactivate users in Webrix when unassigned in Okta
-
Click Save
Your SCIM provisioning is now configured.
Contact support
If you continue to experience issues, contact Webrix support at [email protected] with the following information:
- Your Okta organization domain
- The error message or behavior you're experiencing
- Screenshots of your configuration (with sensitive information redacted)