Machine Users
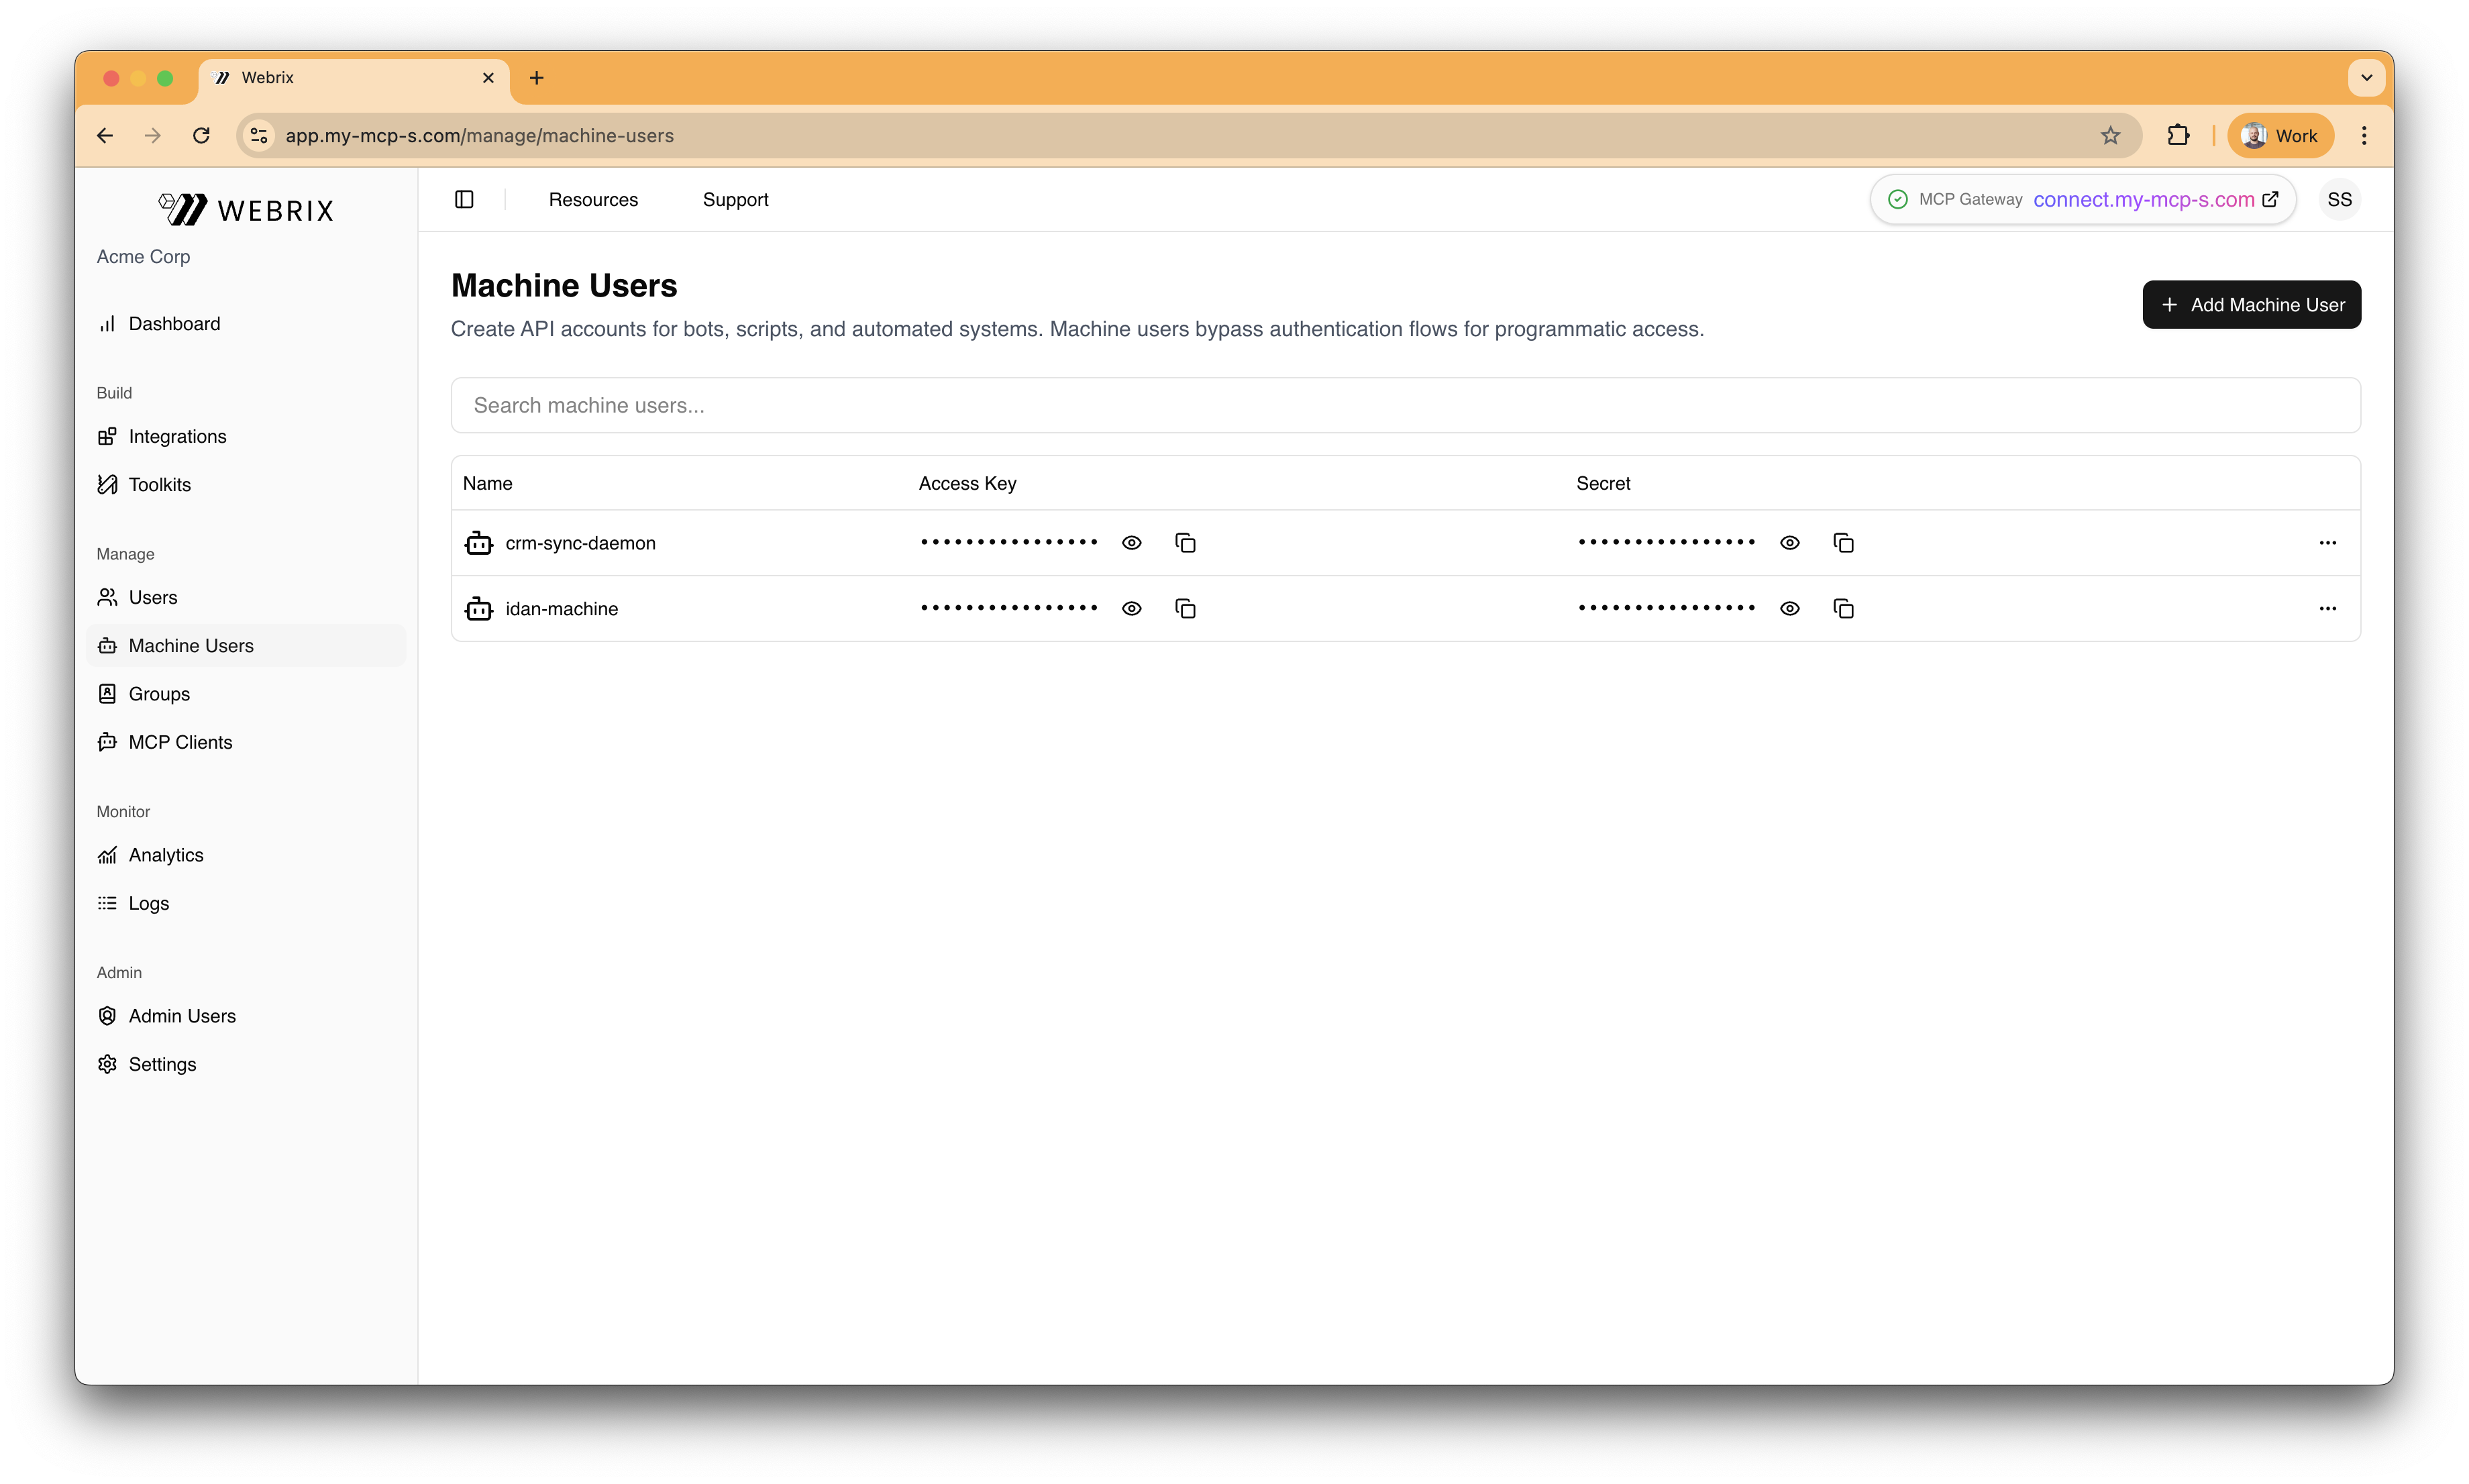
Create API accounts for bots, scripts, and automations. Machine users enable programmatic access to Webrix without requiring a human identity.
What you can do here
- Create and manage machine users for programmatic access
- Rotate credentials by recreating accounts when needed
- Configure OAuth2 Client Credentials for enterprise security requirements
Add a machine user
- Click Add Machine User.
- Enter a name.
- Save to provision credentials within your secure environment.
Using Machine Users
Machine users support two authentication methods depending on your security requirements.
Without Client Credentials (API Key)
The simplest approach for internal scripts and trusted environments.
When you create a machine user, Webrix generates an API key automatically. Use this key to authenticate API requests:
curl -H "Authorization: Bearer <YOUR_API_KEY>" \
  https://your-webrix-instance.com/api/...
Best for:
- Internal automation scripts
- Development and testing
- Trusted network environments
With Client Credentials (OAuth2)
For enterprise environments that require OAuth2 authentication through your Identity Provider (IdP).
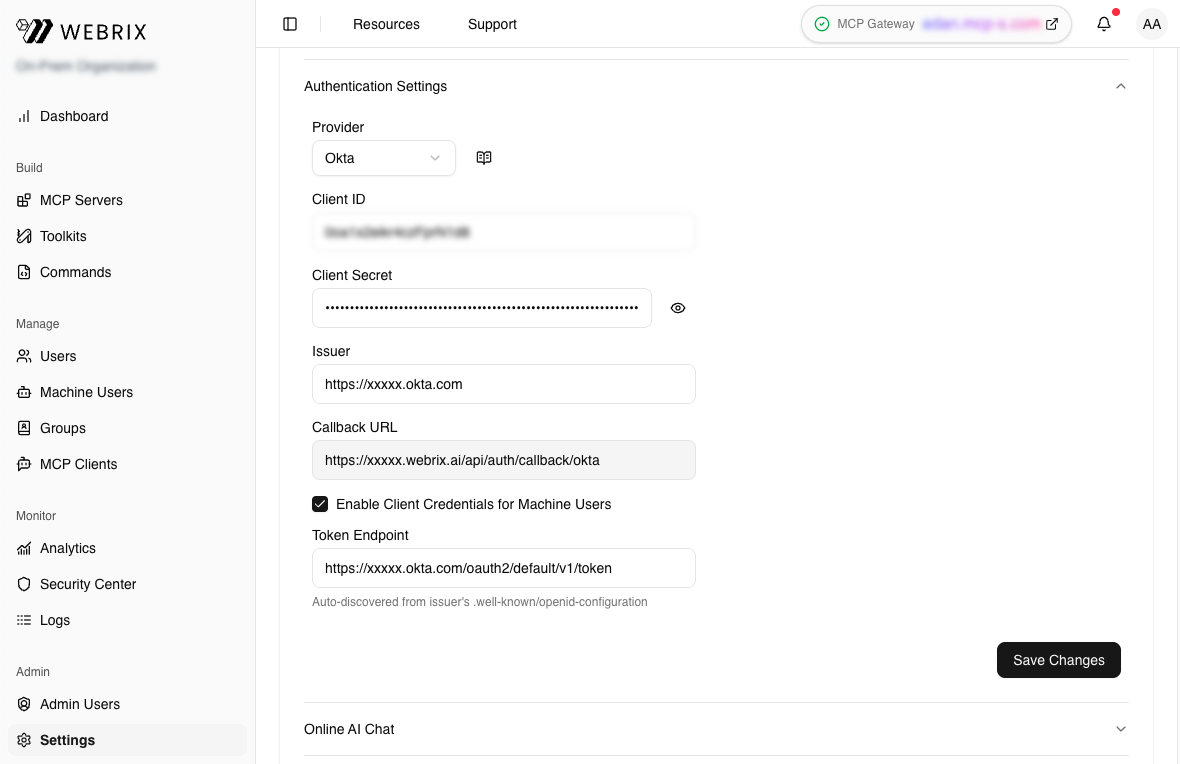
Step 1: Enable Client Credentials in Webrix
- Go to Settings → Authentication.
- Check Enable Client Credentials for Machine Users.
- The Token Endpoint may be auto-detected from your SSO configuration. If not, enter it manually (e.g.,
https://your-domain.okta.com/oauth2/default/v1/token). - Click Save.
Step 2: Configure Client Credentials for a Machine User
- In the Machine Users list, click the three-dot menu (⋮) on your machine user row.
- Click Client Credentials.
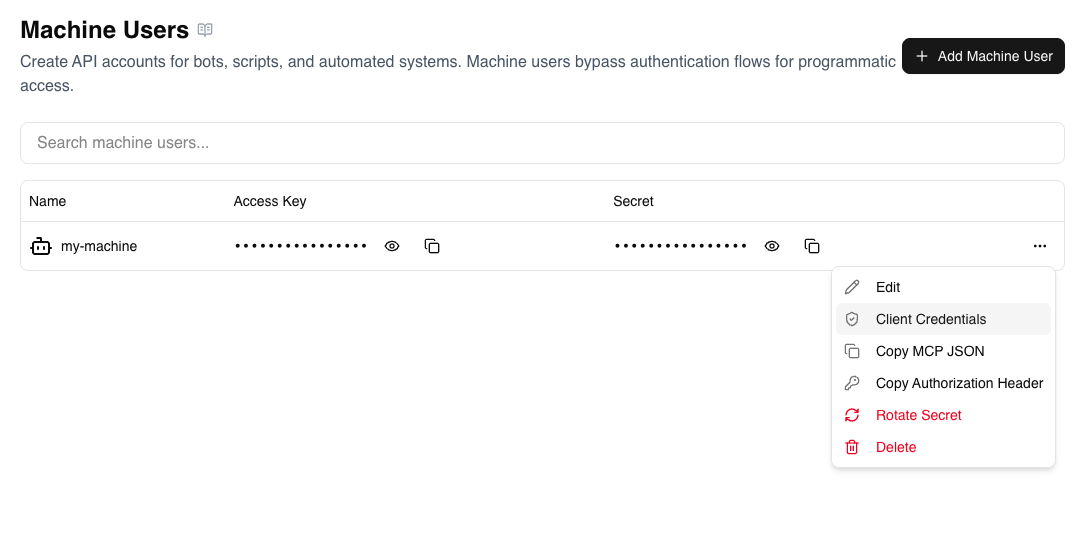
-
Enter the credentials from your IdP:
- Client ID: The OAuth2 client identifier
- Client Secret: The OAuth2 client secret
-
Click Save.
Now Webrix will use the OAuth2 Client Credentials flow to authenticate this machine user.
Okta Setup for Client Credentials
This guide explains how to configure Okta to support the OAuth2 Client Credentials flow for machine users.
Prerequisites
Before you begin, ensure you have:
- An Okta account with API Access Management enabled
- Included in Okta Developer (free) accounts
- Available as an add-on for Okta Workforce Identity
- Admin access to create applications and configure authorization servers
1. Create an API Services Application
- Log in to your Okta Admin Console.
- Navigate to Applications → Applications.
- Click Create App Integration.
- Select API Services and click Next.
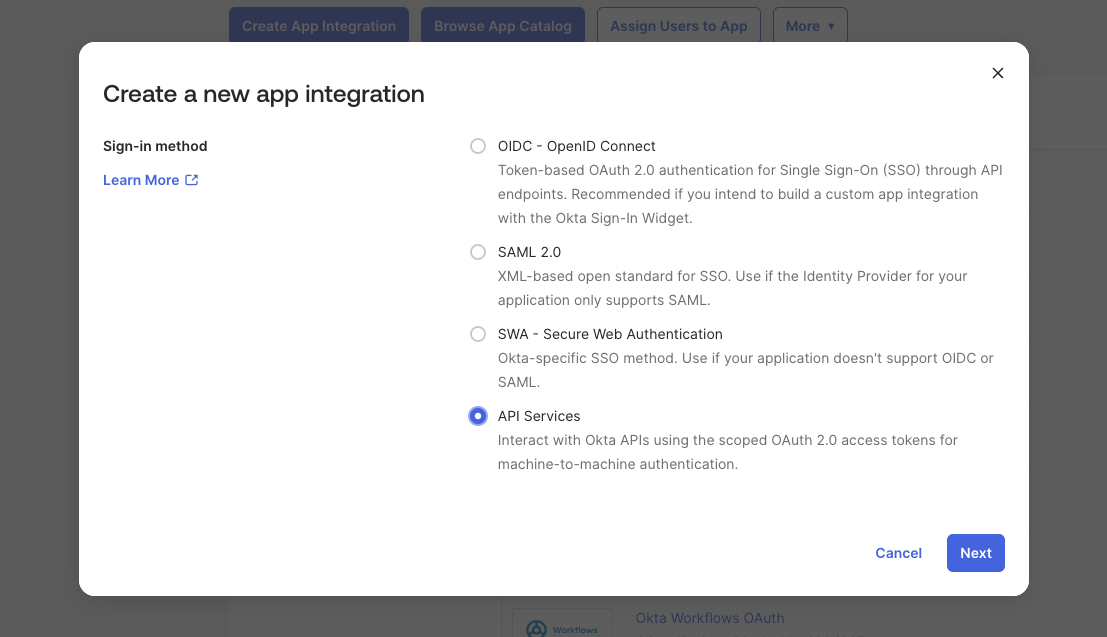
- Enter a name (e.g., "Webrix Machine User") and click Save.
2. Set Up Authorization Server
- Go to Security → API.
- Click on Authorization Servers tab.
- You should see a default authorization server. Click on it.
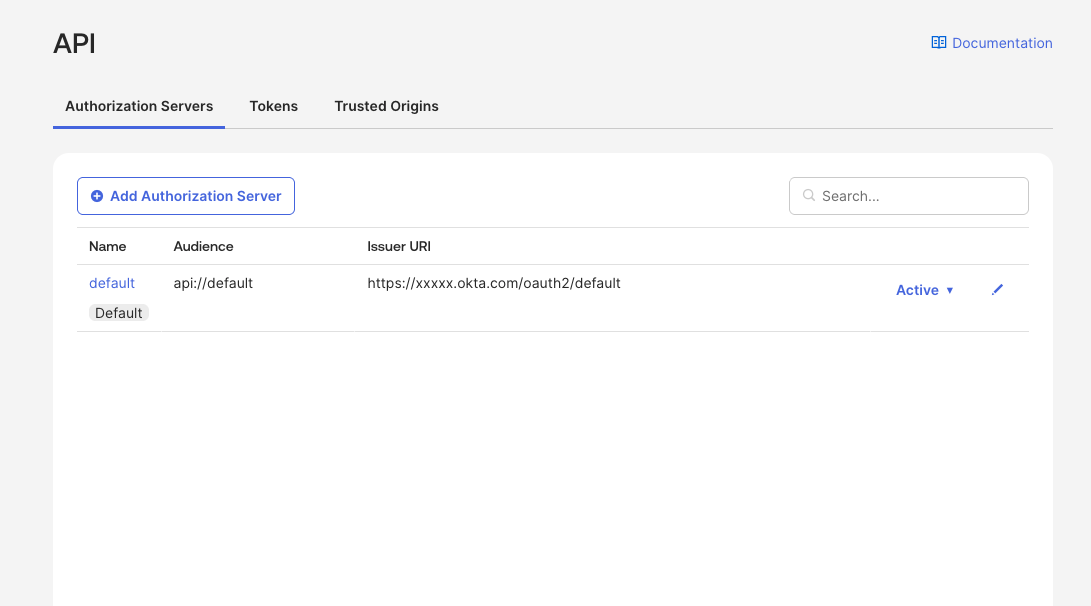
If you don't see an "Authorization Servers" tab, API Access Management is not enabled in your Okta org. You'll need an Okta Developer account or contact Okta to enable this feature.
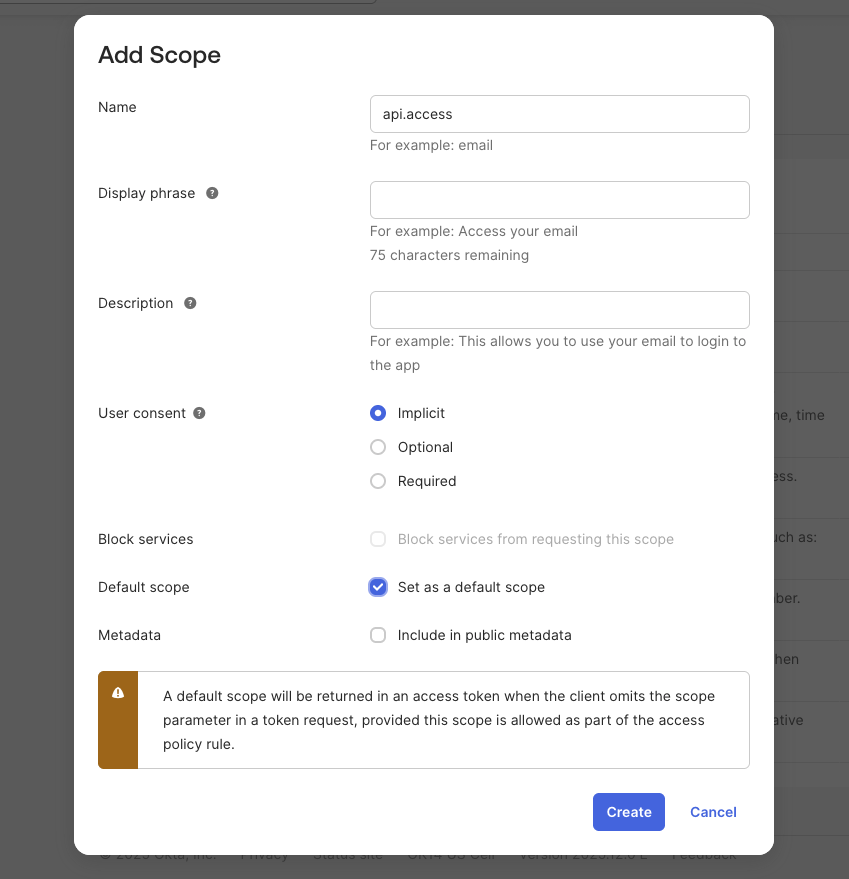
3. Create a Scope
- Edit the authorization server, and go to the Scopes tab.
- Click Add Scope.
- Configure:
- Name:
api.access(or any name you prefer) - Description: "Access for machine users"
- Check Set as a default scope (recommended)
- Name:
- Click Create.
4. Create an Access Policy
- Go to the Access Policies tab.
- Click Add Policy.
- Configure:
- Name: "Client Credentials Policy"
- Description: "Allow client credentials for machine users"
- Assign to: All clients (or select your specific app)
- Click Create Policy.
- Inside the policy, click Add Rule.
- Configure:
- Name: "Allow Client Credentials"
- Grant type: Check Client Credentials
- Scopes: Any scopes (or select
api.access)
- Click Create Rule.
5. Get Your Credentials
- Go back to Applications → Applications.
- Click on your API Services app (e.g., "Webrix Machine User").
- In the General tab, find the Client Credentials section.
- Copy the Client ID and Client Secret.
6. Configure in Webrix
- Copy the Token Endpoint from your authorization server:
https://{your-okta-domain}/oauth2/default/v1/token - In Webrix Settings → Authentication, paste the Token Endpoint.
- In Machine Users, configure your machine user with the Client ID and Client Secret from Okta.
Troubleshooting
"Feature not enabled" Error
This means API Access Management is not enabled in your Okta org. Use an Okta Developer account or contact Okta support.
"Invalid scope" Error
Ensure you've created a scope in your authorization server and either set it as default or request it explicitly.
"Policy evaluation failed" Error
Create an Access Policy with a rule that allows the Client Credentials grant type.
"Invalid client" Error
Verify your Client ID and Client Secret are correct and match the application in Okta.