SCIM Provisioning with Okta
This guide explains how to connect Okta to your application using SCIM (System for Cross-domain Identity Management) for automated user and group provisioning.
Prerequisites
Before you begin, ensure you have:
- An Okta admin account
- Your SCIM Base URL:
https://webrix-admin.<your-domain>.com/scim/v2 - Your SCIM Bearer Token (
AUTH_SECRET) - Groups/Users you want to sync
1. Create a New Application in Okta
1.1 Navigate to Okta Applications
Go to your Okta admin portal:
https://<your-domain>-admin.okta.com/admin/apps
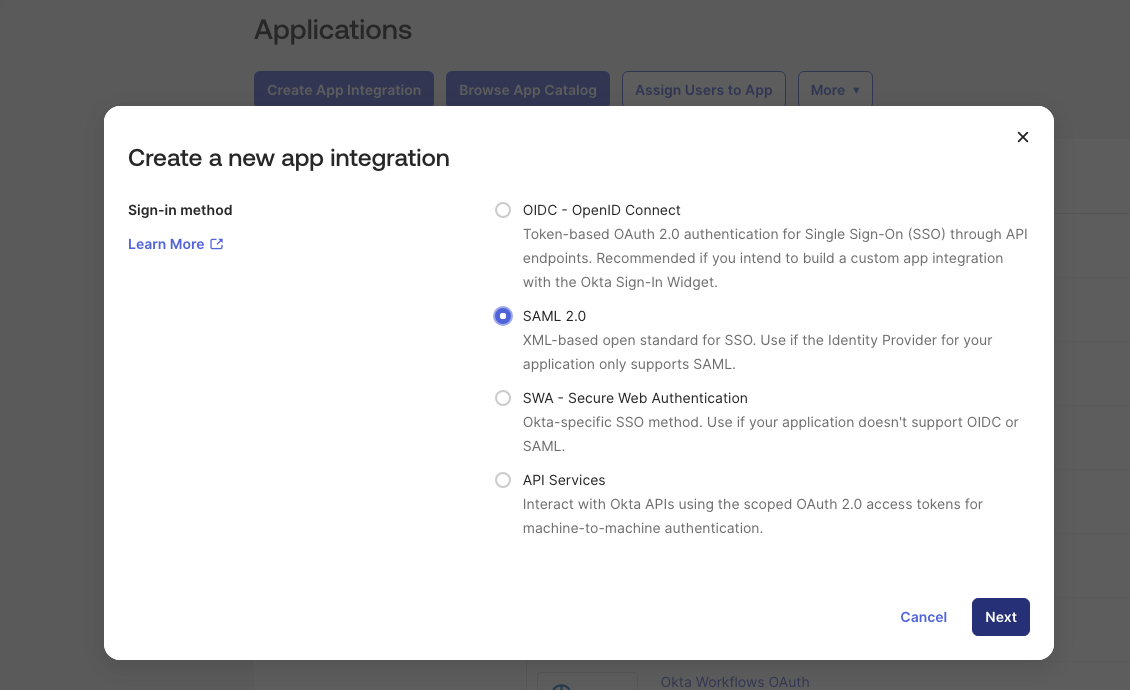
1.2 Create a New App Integration
- Click Create App Integration
- Select SAML 2.0
- Click Next
1.3 App Information
-
App name: Webrix SCIM Integration
-
Logo: Upload this logo:

-
Click Next
2. Configure SAML (Placeholder Values Only)
info
The SCIM implementation does not use SAML for authentication. These values are only required by Okta to create the app integration.
Use the following placeholder values:
- Single sign-on URL:
https://webrix-admin.<your-domain>.com - Audience URI (SP Entity ID):
https://webrix-admin.<your-domain>.com
Click Next, then Finish.
3. Enable SCIM Provisioning in the App
3.1 Open the App General Tab
- Scroll to App Settings
- Click Edit
- Enable the SCIM toggle
- Click Save
4. Configure SCIM Connector
4.1 Go to the Provisioning Tab
- Navigate to the new Provisioning tab
- Click Edit in the SCIM Connection area
4.2 Enter SCIM Details
Configure the following fields:
| Field | Value |
|---|---|
| SCIM connector base URL | https://webrix-admin.<your-domain>.com/scim/v2 |
| Unique identifier field for users | email |
| Supported provisioning actions | Select all |
| Authentication Mode | HTTP Header |
| Authorization | Bearer <YOUR_AUTH_SECRET> |
4.3 Test the Connection
- Click Test Connector Configuration
- If successful, click Save
5. Enable Provisioning Actions
5.1 Configure Provisioning to App
- In the Provisioning → To App section, click Edit
- Enable the following:
- ☑ Create Users
- ☑ Update User Attributes
- ☑ Deactivate Users
- Click Save
6. Assign Users or Groups
6.1 Assign Groups to the Application
- Navigate to Applications and locate your SCIM integration app
- Click the dropdown menu (▼) to the right of the app
- Select Assign to Groups
- Assign the groups you want synchronized with your application
7. Push Groups (SCIM Group Sync)
- Inside your SCIM integration app, go to Push Groups
- Click + Push Groups
- Choose Find groups by name
- Add the groups you have assigned earlier
- Click Save
Verification
Once configured, the integration will automatically:
- Provision new users when they are added to assigned groups in Okta
- Update user attributes when they are modified in Okta
- Deactivate users when they are removed from assigned groups
- Sync group membership changes to your application via SCIM
You can verify the sync status in Okta by checking the Provisioning tab logs and monitoring user/group operations.
Troubleshooting
Connection Test Fails
- Verify your
AUTH_SECRETis correct and matches the server configuration - Ensure the SCIM Base URL is accessible from Okta's network
- Check that the
Authorizationheader includes theBearerprefix
Users Not Syncing
- Confirm users are assigned to groups that are pushed to the application
- Check the Provisioning → To App settings are enabled
- Review Okta's provisioning logs for error messages
Group Sync Issues
- Ensure groups are both assigned (step 6) and pushed (step 7)
- Verify the group has members before attempting to sync
- Check that group operations are completing successfully in Okta logs